You can create a new template inside our Online Creator. Create your own account or get acces to an account of one of your clients.
Reseller Code: If you create a template on commission by an agency, you will need a reseller code. Please ask your agency before you start. A Resller Code can give you access to locked modules and will unlock them automatically.
After your successfull login, you will be in the main menu of the Online Creator. To edit your default template you need the module Design 1, which is only available with a Basic Account, Pro Account or a Reseller Code.

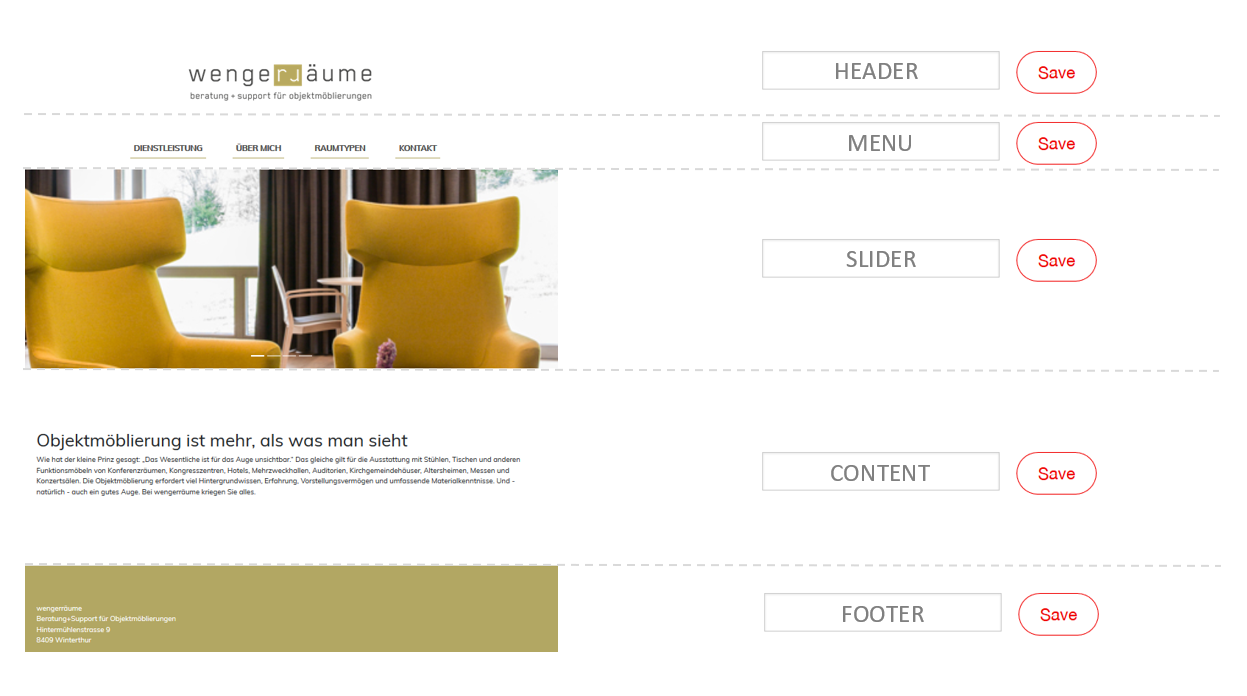
With your Design module 1 you are able to manage the areas of your website. These areas are used to structure your website and to fill it with content. It is necessary to define them at the beginning to fill them with static content afterwords, like text and images.
This also gives you access to the actual template of your website. Besides other things, you can also customize the CSS file of your template or supplement your areas with additional HTML code.
Areas are placeholders, compareable with HTML elements (such as DIVs). You should define them right at the beginning. They are necessary to structure your website and should be changed rarely after you defined them. To set these areas correctly it will help you to have a HTML segmented structure in mind. Just name these areas after your main areas of your website.

In your settings module 1 you can edit existing areas, add new ones or change the order. "Active" marked areas are getting loaded automatically with your website. You should name especially new areas unique and wisely. Your area names will get saved after a click on the "save" button.

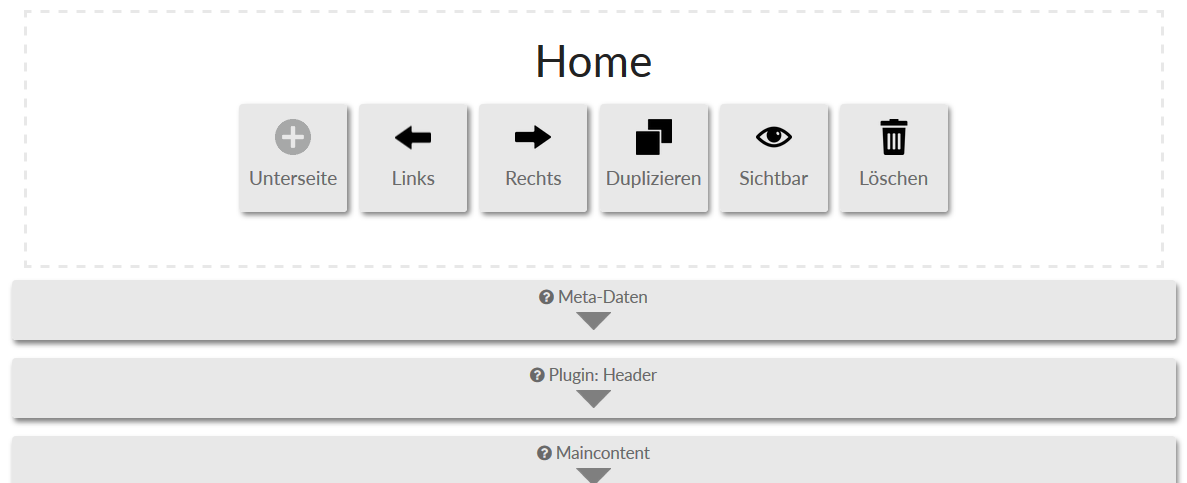
In case the checkmark "Editable" 2 is set on a specific area, this area will be also avaiable in your main menu (see picture below) to fill them manually. Such areas are automatically provided with a WYSIWYG editor and are mainly used for editing static content, such as texts or images. An area should only get the status "Editable" if its content will get managed often and manually. For all other areas, the check mark "Editable" should be removed (you can change these settings any time).

Only areas marked "Active" 3 will be loaded on your page. Make sure that these check boxes are only enabled for areas you want to load. Regardless of whether the area is editable for the customer or not. Sometimes is better to set an area on "active", but to remove the mark "editable". This will give you and yours clients a better overview afterwards.
You can manage and edit your templates (in that case similar to a design) by our design module. A template is simply composed by CSS and HTML code, which makes it easy to customize.
Note: Creating a backup (backup module required) will also save your current template. Your created backups can be loaded at any time. Be carefull - If you load one of your backups, your current template of the web page will be overwritten with your backuped template. A backup should therefore be loaded carefully. Once you loaded a backup you will find the template of your backup in your template list as well.

You can easily edit any of your designs / templates. Simply select one from the drop-down menu and click on "Edit". Afterwards you will see the edit mode of your selected design.
After selecting a suitable design you should click on "Edit". You will get access to the edit mode. Here you can access the CSS file of your website. Your CSS file will be loaded at the end of all other CSS files. This allows you to override any other CSS properties, which are loaded from another file for example.
Note: If you want to integrate files, such as images or fonts, you have to upload them first with the Online Creator's file manager. Right afterwards you can integrate them into your CSS code like this:
body{ background: url(uploads/Images/background.jpg); } /* uploads/[Folder]/[FILE] */
Below the CSS Editor you will find the button "More settings". This opens the structure editing mode of your template. With that you have the possibility to insert further HTML code around your previously defined areas. You can also choose a style library to be loaded with your website.

Areas you previously marked as "Active" are now displayed in a dark gray. Areas with a lighter gray, are the inactive ones. They get ignored when loading your website.
Note: You can also insert HTML-typical elements for images and other files types. However, the path to the file changes as soon as several languages have been activated. In that case your web URL contains path with additional strings like / DE / or / FR /. In that case all file paths must beginning by an aditional string like
Just one language is active: src="Homepag/uploads/Images/logo.png"
More then one language are active: src="Homepag/uploads/Images/logo.png"
Plugins can be activated and loaded by our plugin module. Each plugin has its own settings. To activate plugins, just click on the button "More plugins". After you can activate your plugins as you wish.
Attention: Certain plugins will charge fees. If you have used a reseller code, you should clarify which subscription has been activated. Only with the Pro subscription, all plugins are free to activate.
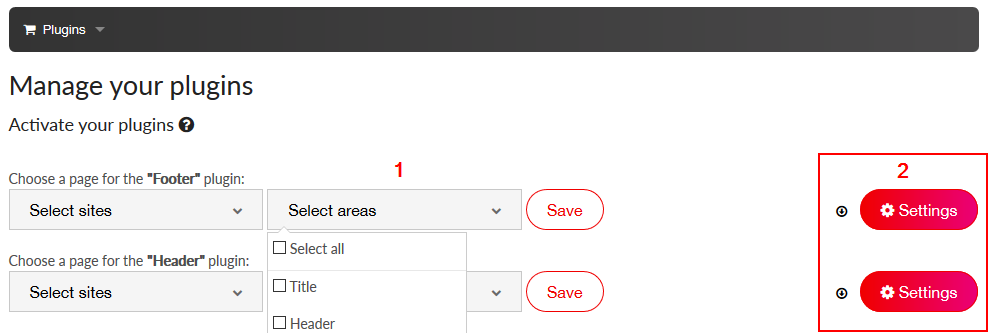
Your plugins will be listed chronologically. To load plugins automatically on your webpage, they must first be assigned to a page and optionally to an area. Plugins can be assigned to multiple pages 1.1 and multiple sections 1.2 of your web page, even at the same time. You can decide by yourself, where your plugins iwill be loaded.

Each plugin has its own settings 2 to manage it. Certain plugins need basic configurations to get loaded correctly. It depends by the plugin.
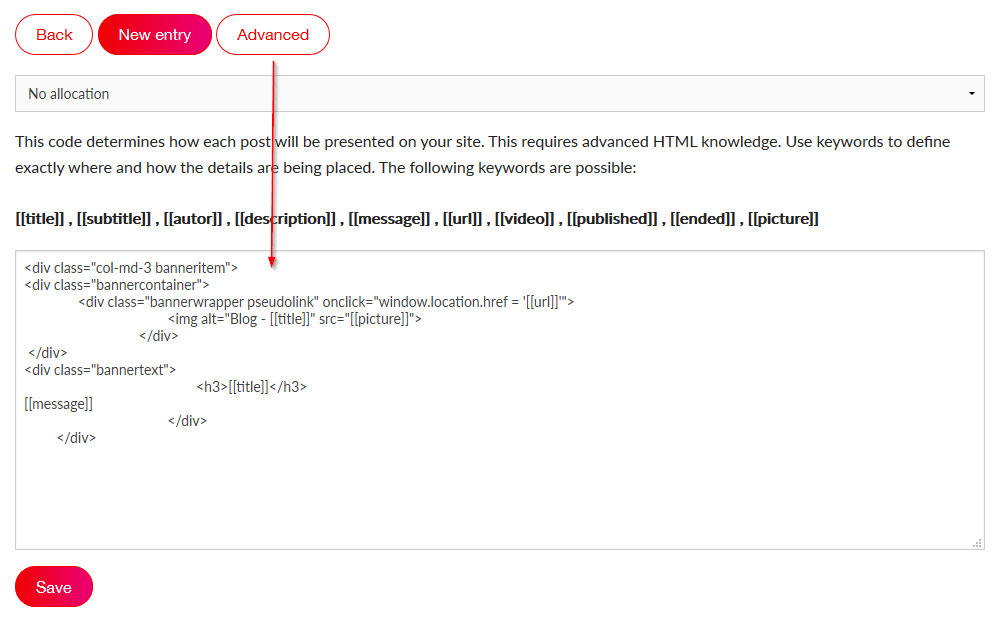
Each plugin has its own configuration. Some plugins, such as the news, blog or banner plugin, even have "advanced settings". Such plugins open a small editor in which the HTML code can be entered. This HTML code get reloaded for each element within the plugin (for example, for each blog post). Placeholders can now be used to define where the individual details of an entry have to be loaded.
